OWASP MAS - I
Solving the OWASP Uncrackable L1. Covers static analysis with JADX, bypassing anti-root detections, and Frida scripting for function hooking.

Android Uncrackable L1
Statement : A secret string is hidden somewhere in this app. Find a way to extract it.
This crackme is from the OWASP MAS crackmes.
Resources
Here are the resources I found useful during the reverse engineering and exploitation processes.
- https://medium.com/@ahmedafatah/android-security-for-dummies-root-detection-695bd4d90db8
- https://droidwin.com/how-to-hide-su-file-and-magisk-file/
- https://stackoverflow.com/questions/18808705/android-root-detection-using-build-tags
- https://developer.android.com/reference/android/content/pm/ApplicationInfo#flags
- https://frida.re/docs/android/
- https://frida.re/docs/javascript-api
I. First analysis
We get this APK file :
| |
So there’s obviously the AndroidManifest.xml file containing the app metadata. The file command also shows the presence of the APK Signing Block.
APK Signing Block
An APK Signing Block is a dedicated section within an APK. It stores the app’s cryptographic signatures and developer identity, ensuring the app is authentic, hasn’t been tampered with, and safely installs on the Android operating system.
We can install the APK file on our emulated rooted device :
| |
While launching the app, we see it detects right away the device is rooted.
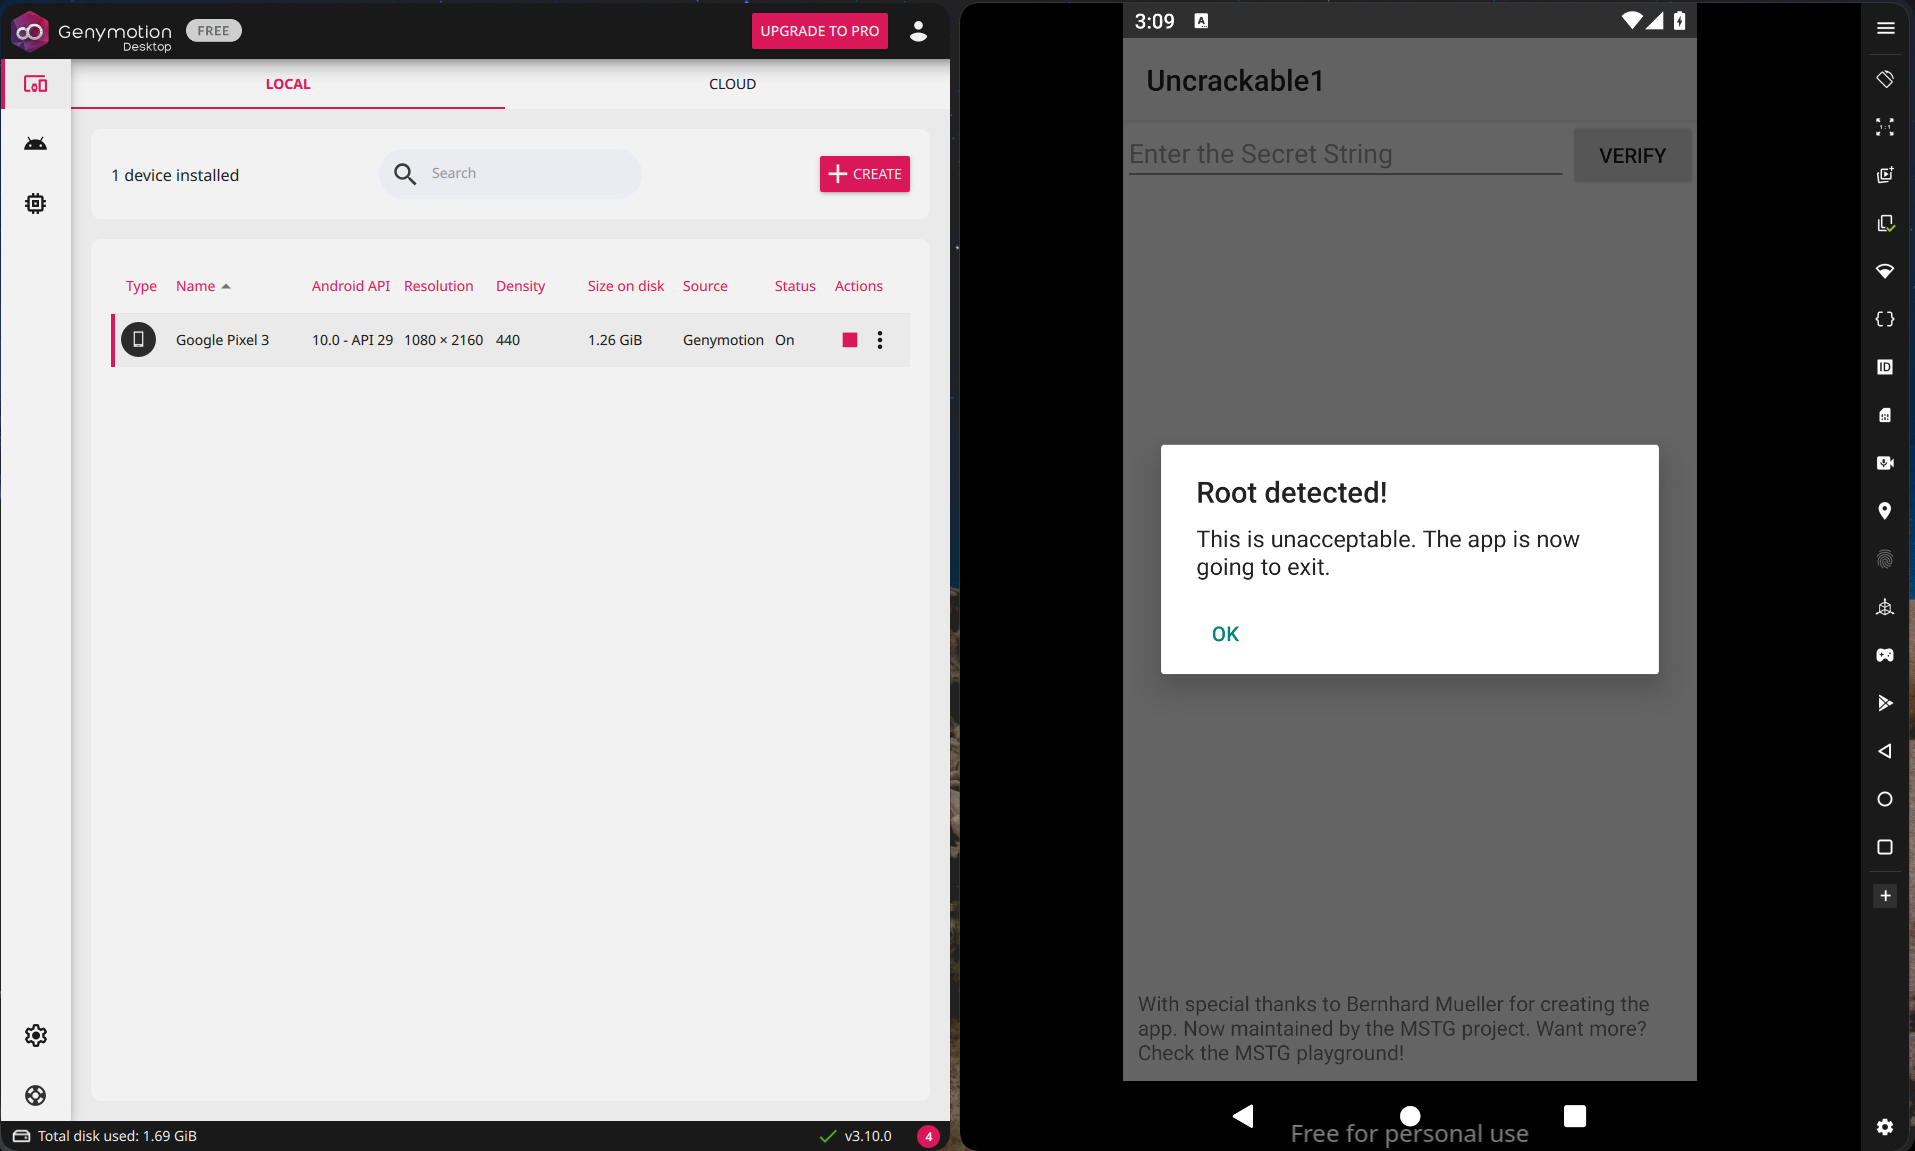
II. Static reverse with JADX
Let’s inspect the source code in order to understand how the root detection is made so we’ll be able to understand how to bypass it.
By looking at the onCreate function (the start of the app lifecycle) we can see that four verifications are made before letting the user access the app.
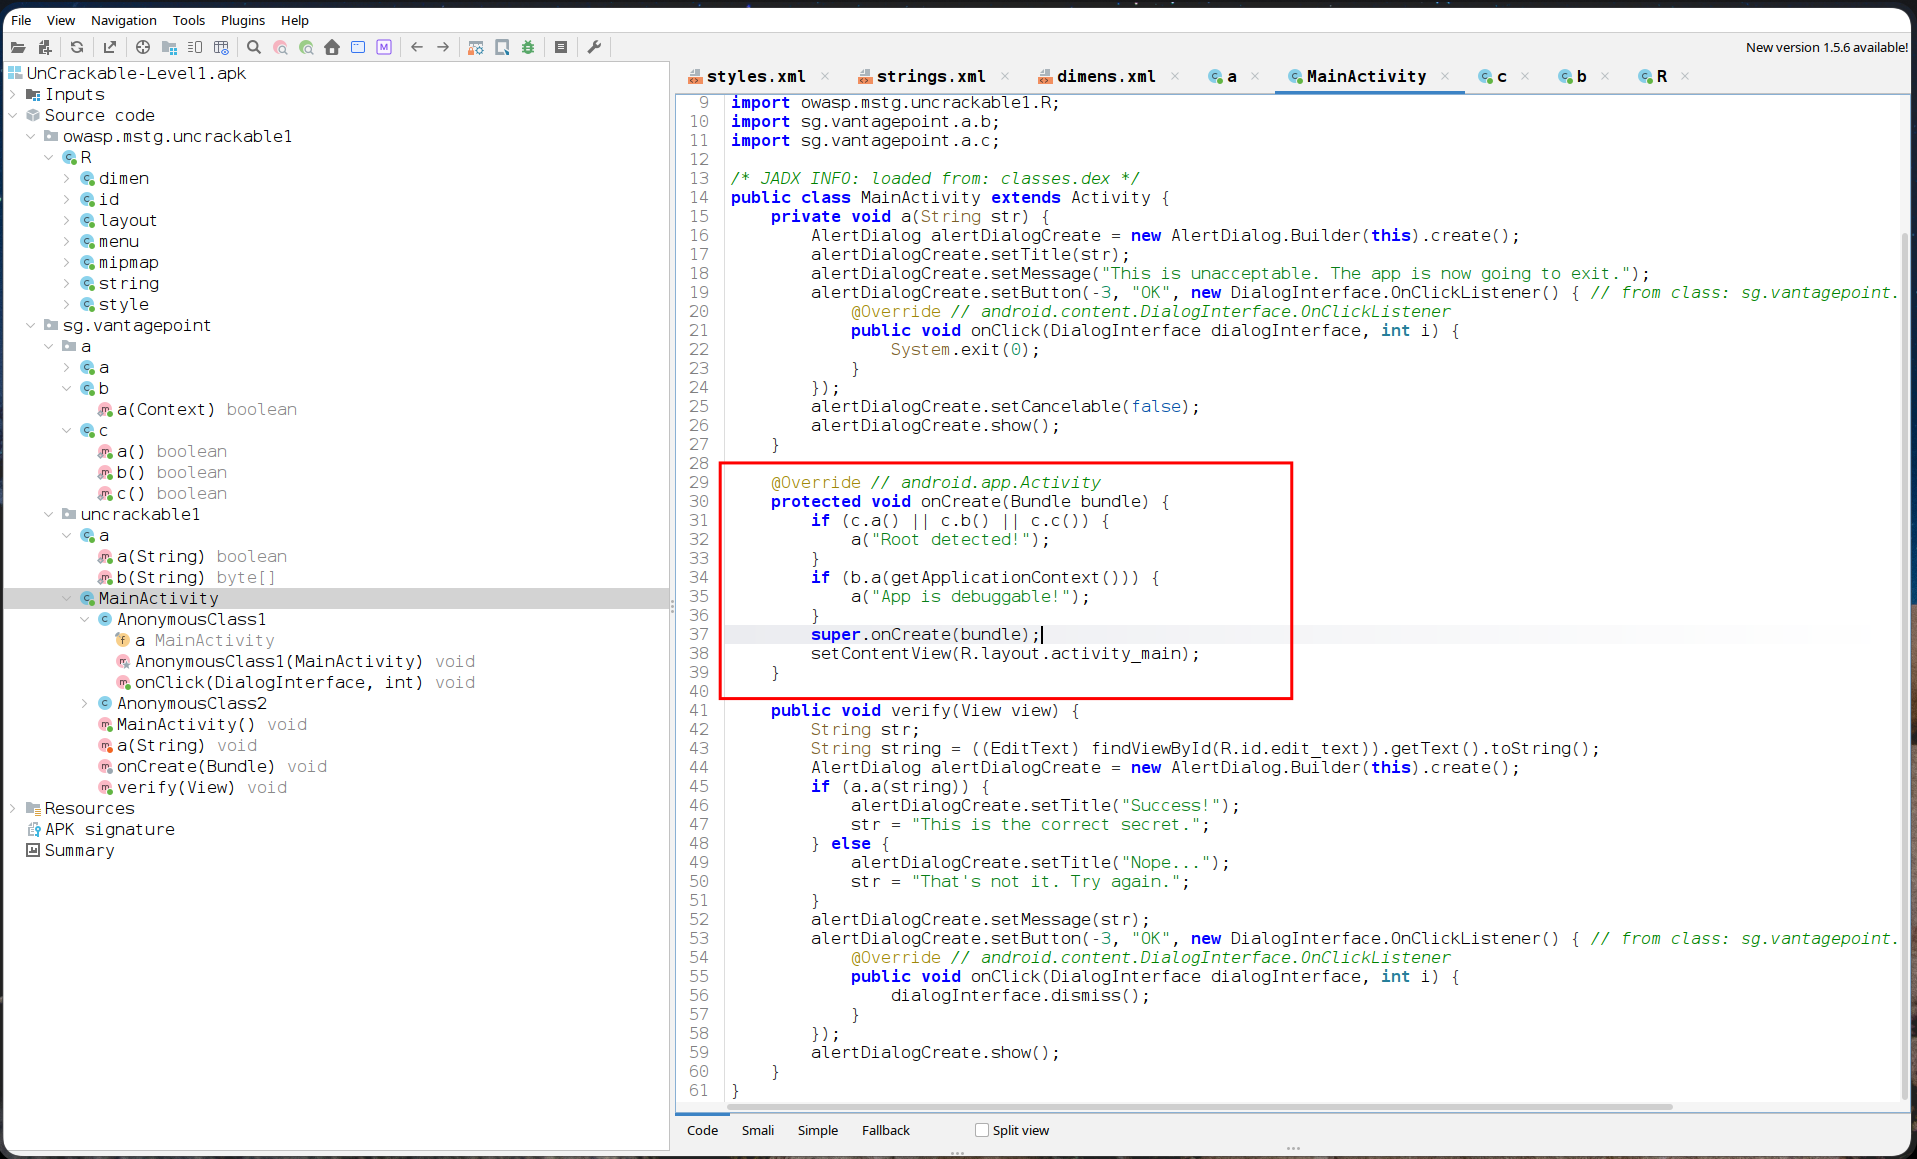
Now, we can look for the “c” class to see the anti-root protections. Here is the commented version :
| |
1. c.a() : Protection via PATH analysis
Function code :
| |
To bypass this, let’s first look at our PATH on our android device :
| |
After running this command, we can see which directories of our device path contains the su binary :
| |
Here are two ways of bypassing this.
- The easiest way : Change the return value of this function with Frida’s ability to hook functions, so it returns
falseno matter what.- The hardest way : Install LSPosed Framework, Magisk. Then, flash the Shamiko module with Magisk…so the
/system/bin/suand/system/xbin/suare hidden. It’s heavy but works against real production apps. Here’s a link to follow the process : https://droidwin.com/how-to-hide-su-file-and-magisk-file/
We’ll go with the first way as the second one would require to setup the Android device with multiple apps/frameworks and this is overkill for such a crackme.
2. c.b() : Protection via Build Tags
Function code :
| |
We can see the verification made on Build.TAGS
The documentation says the android.os.Build.TAGS is a string containing comma-separated tags describing the build, like “unsigned,debug”.
There’s a post on Stackoverflow asking what is this root detection doing :
This method checks the android.os.Build.TAGS property to see if the operating system was signed with test-keys (typically used in AOSP or custom ROMs) instead of the official release-keys provided by device manufacturers.
However this approach is really unreliable for two reasons :
- False positives: If a user installs a custom OS like Graphene for privacy reasons, he’d get blocked for no reason while being perfectly legitimate.
- False negatives: Modern rooting solutions are “systemless”, so they don’t modify the build tags. So a rooted device could still display
release-keysand bypass this protection.
As for c.a(), we’ll just override this method for it to return false.
3. c.c() : Protection via existing files checking
This method checks if those files exist. If at least one of them does, it returns true.
| |
File utility :
/system/app/Superuser.apk: The GUI application installed on the device to manage root permissions and prompt the user when an app requests access./system/xbin/daemonsu: The background daemon process required by SuperSU to handle the actual root elevation requests./system/etc/init.d/99SuperSUDaemon: A boot script that ensures the SuperSU daemon starts automatically every time the Android device powers on./system/bin/.ext/.su: A hidden directory and binary location. Some older rooting methods placed the su binary here to hide it from basic checks that only scanned standard directories like/system/bin/su./system/etc/.has_su_daemon&/system/etc/.installed_su_daemon: Hidden empty files acting as markers. The SuperSU installer creates them to flag that the system has been successfully rooted./dev/com.koushikdutta.superuser.daemon/: A specific Unix socket or device node created by Koushik Dutta’s Superuser framework (ClockWorkMod) to communicate with its background processes.
As we can see, all those files are particular cases, so this verification isn’t really useful/strong.
The evolution of root hiding
Like the
Build.TAGScheck, looking for hardcoded paths is not effective against modern tools. Frameworks like Magisk do not install their binaries or daemons in/systemanymore, making them completely invisible to this type of static scanning.
For a third time, we’ll use Frida’s ability to hook methods so c.c() returns false.
4. b.a(Context context) : Anti-debug protection via application flags
We now can look for the “b” class as we know how to bypass the 3 anti-root protections we’ve just seen.
| |
What this method does is reading the 2nd least significant bit of the flags property and :
- Returns true if the flag is set.
- Returns false if the flag is not set.
After reading the Android documentation, we can see the flag located at the 2nd least significant bit is the FLAG_DEBUGGABLE constant.
If the bit is set, it means that the application would like to allow debugging of its code. It’s not set by default as we didn’t modify the app source code for it to be set, so it’s not allowing debugging.
Once again, we’ll hook this function with Frida so it returns false no matter what.
III. Function hooking with Frida JS API
We can use TypeScript to write our JS script so we’ll get autocompletion for Frida syntax.
Setup
Scripting requirements
In order to be able to code in TS, we have to setup like this :
| |
We now have to write our exploit script in agent/index.ts.
TypeScript Setup
We can keep a separate terminal open and run
npm run watch. This will automatically compile our TypeScript code into JavaScript in real time after each modification.Also, we can add the following line at the very top of our
index.tsfile to enable IDE autocompletion and type definitions for the Frida and Java APIs:/// <reference types="frida-gum" />
Frida server
As our android device is rooted, we can simply install the frida-server on the device.
Once again, we just have to follow what the documentation says :
So it should look like that :
| |
Scripting the hooks
Now the server is running, let’s write our script.
The Frida documentation is easy to understand. To hook a function, we do :
| |
Let’s see if the anti-root protection message changes with this script, as it hooks the 3 anti root protection functions :
| |
We can use the command below to make frida itself start the application while injecting our script into the Java runtime.
-U: Tells Frida to connect to the USB plugged device. Here, the “usb plugged device” is recognized through ADB.-f owasp.mstg.uncrackable1: Tells frida to start the application itself. If we did not use this option, the anti-root detection would be effective even before our script is injected into the runtime.-l _agent.js: We use theagent/index.tsto write our code that is compiled into the_agent.jsfile. So this is the final script containing our exploit.
| |
Looking at our device, we can see the anti root warning disappeared and that we can now enter the string we want in the input field. Let’s try a random string to see what message we now get.
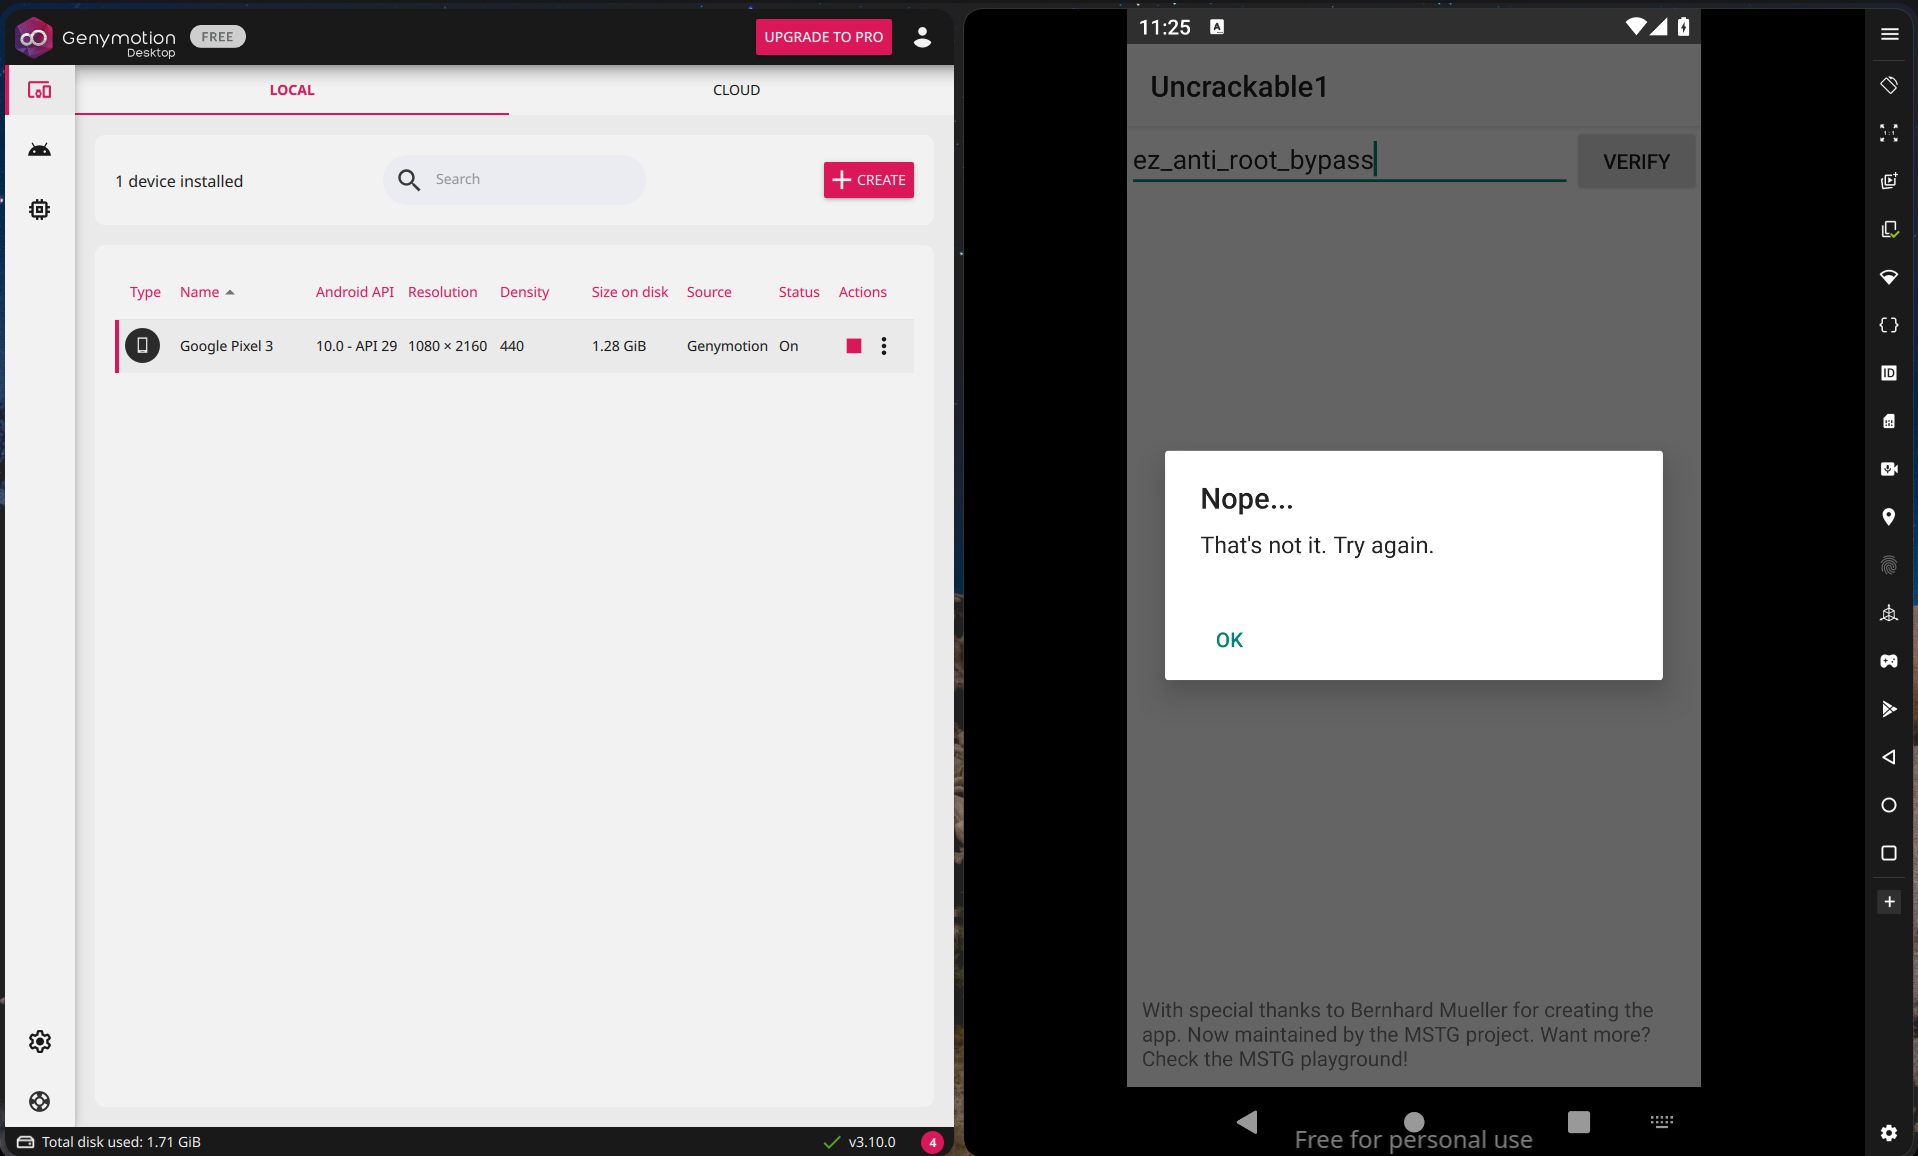
Anti-debug function hooking
We bypassed the anti-root protections. The anti-debug protection (application flags) was not triggered as we did not modify the APK, so no need to add a hook for it into our exploitation script.
Finding the secret
Now that we can do whatever we want on the app as we bypassed the protections, let’s find the string to validate this crackme.
This function is called whenever the user clicks on the “Verify” button.
| |
This is the interesting part. It takes the user input - the “string” variable - and calls the sg.vantagepoint.uncrackable1.a.a(String str) function.
| |
Going into the “a” class of the sg.vantagepoint.uncrackable1 package, we find this code for the “a” method :
| |
Instead of wasting time trying to understand the crypto operations, let’s hook the sg.vantagepoint.a.a.a function so it directly prints the value it computes (the expected value for our input).
The method looks like this :
| |
We can append this at the end of our agent/index.ts :
| |
By relaunching the script injection with frida and submitting a random input, we indeed get the computed secret !
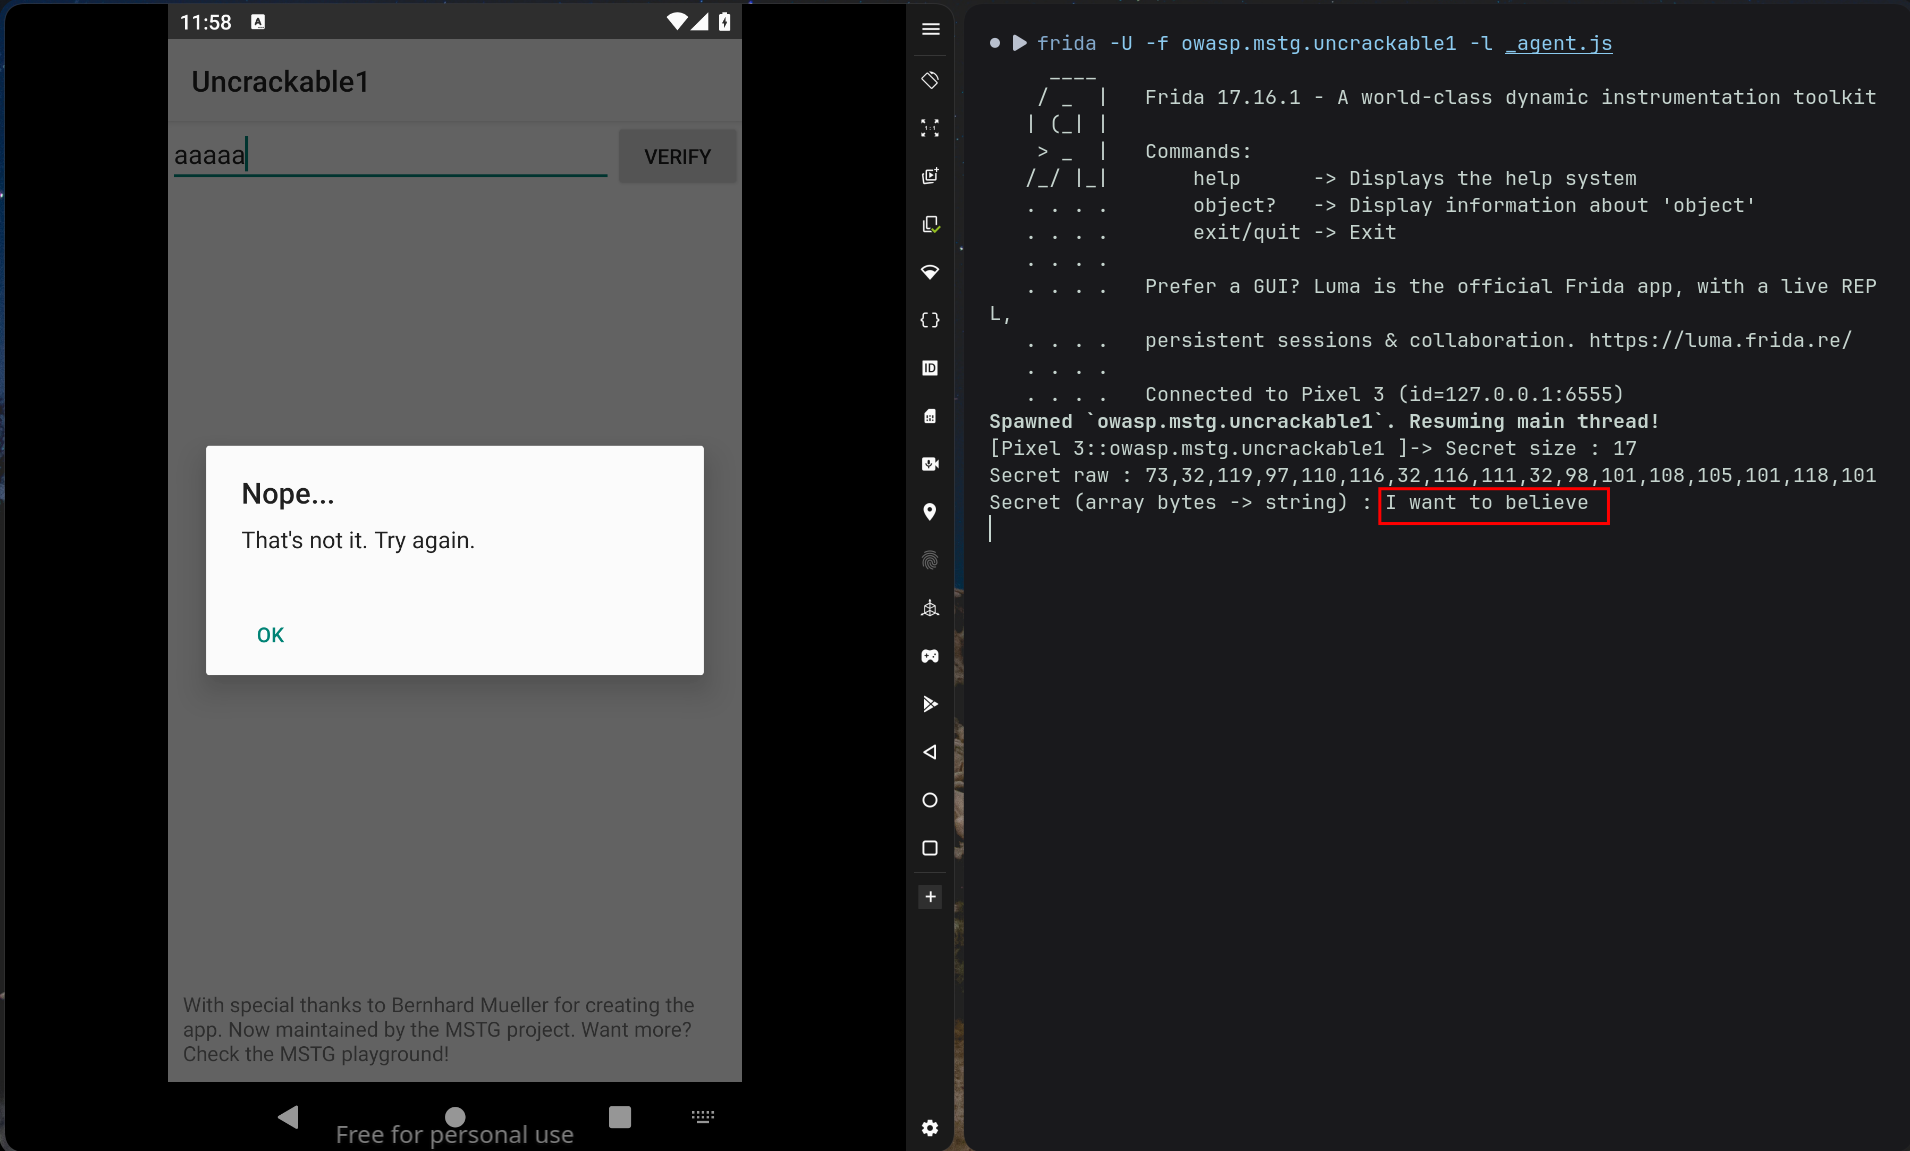
| |