OWASP MAS - II
Solving the OWASP Uncrackable L2. Covers bypassing Java-side protections with Frida, introducing the Java Native Interface (JNI), extracing and analyzing native library (.so) logic.
Android Uncrackable L2
Note
If you haven’t checked yet, the UncrackableL1 writeup is available here.
Statement: This app holds a secret inside. May include traces of native code.
This crackme is from the OWASP MAS crackmes.
Resources
Here are the resources I found useful during the reverse engineering and exploitation processes.
- https://developer.android.com/privacy-and-security/risks/use-of-native-code
- https://hacktricks.wiki/en/mobile-pentesting/android-app-pentesting/reversing-native-libraries.html
I. First analysis
We get this APK file :
| |
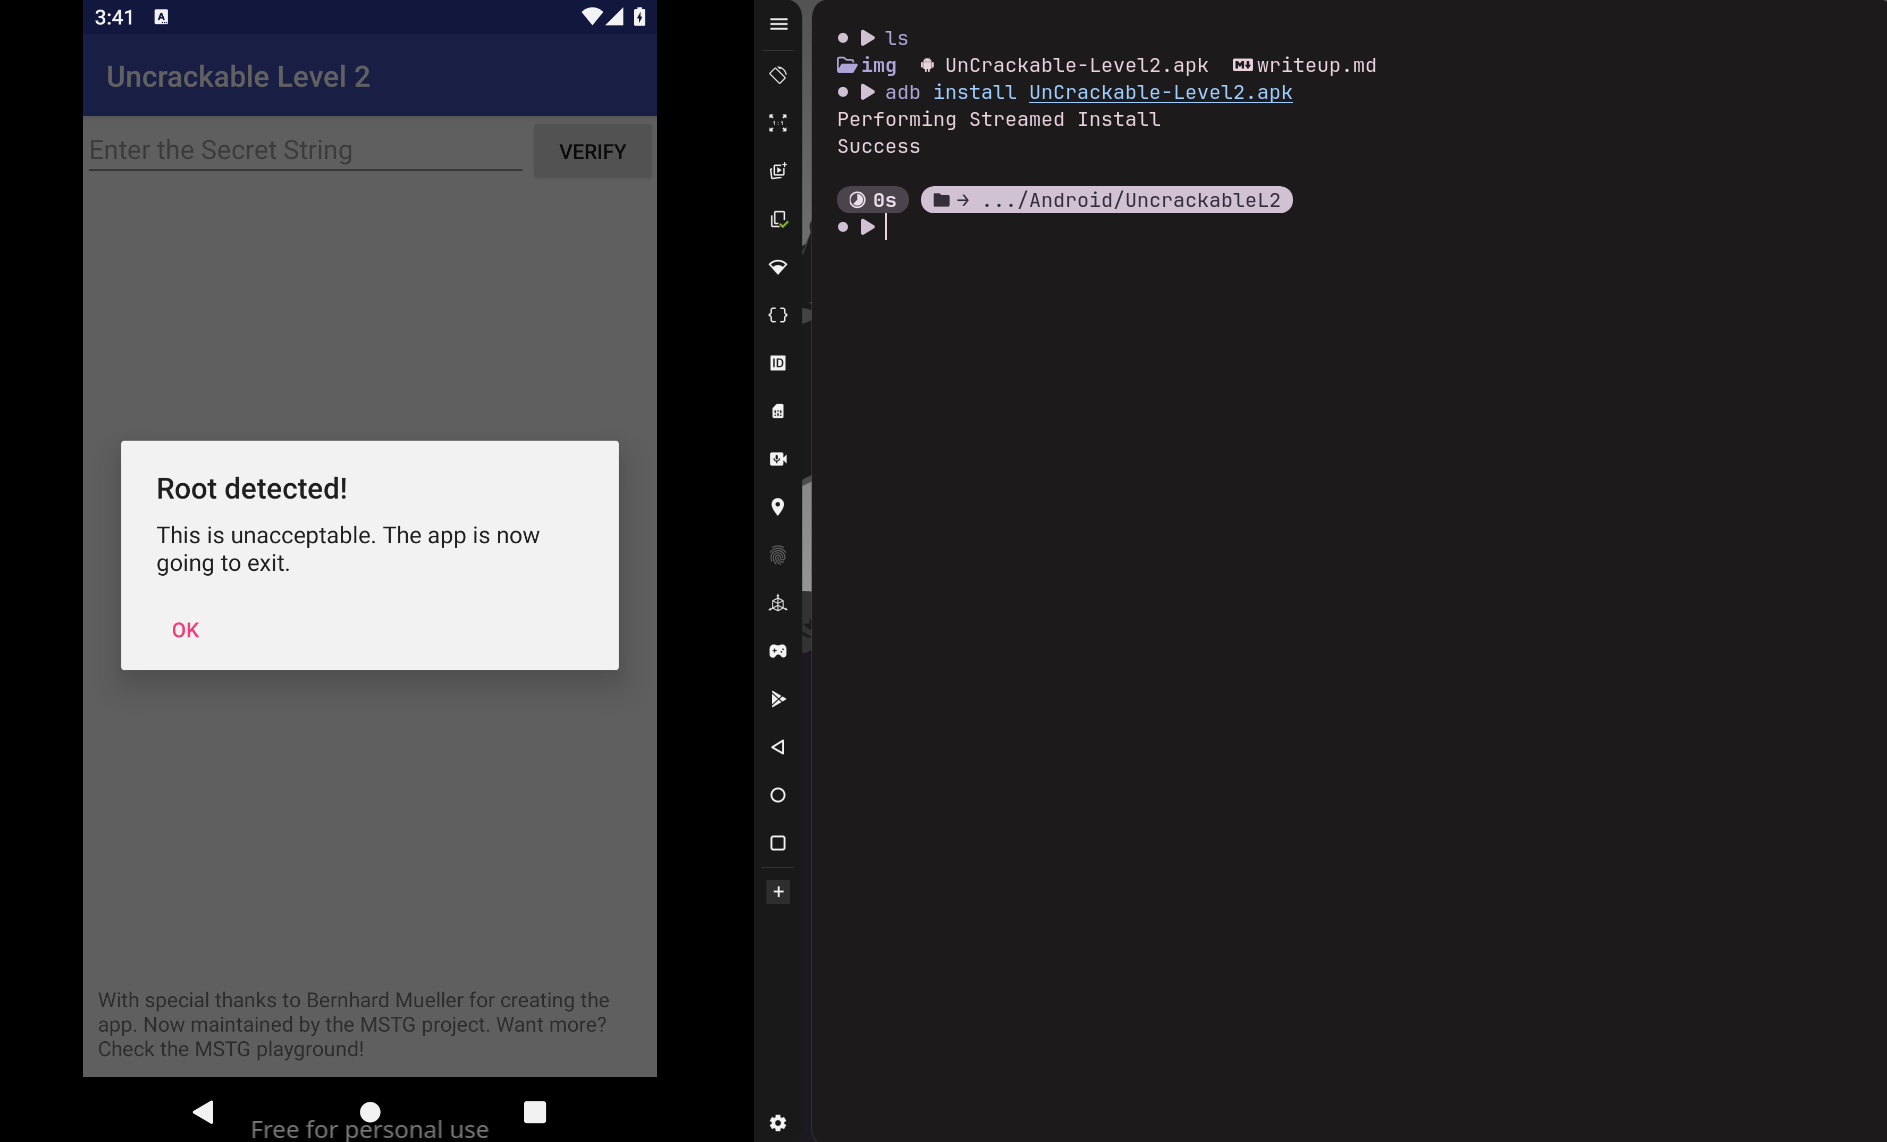
Let’s install the APK file on our emulated root device :
| |
Like the first crackme, it detects that the device is rooted, and forces the user to exit the app.
II. Understanding Native Code
Before diving into the reverse engineering part, let’s understand how native code works.
In the real world, developers use Android’s Native Development Kit (NDK) to write C/C++ libraries for two main reasons.
- Performance (e.g., game engines, video processing).
- Security and obfuscation, which is highly relevant to this crackme.
As we saw in Level 1, Dalvik bytecode (.dex classes) is easily decompiled into highly readable source code using tools like JADX. Developers often move the critical code logic into native libraries (.so files) because compiled ARM (or any other architecture) assembly is drastically harder to reverse engineer than Java bytecode.
The official Android documentation explains that the use of native code also introduces security risks such as buffer overflows, format string vulnerabilities and integer overflows !
We could still ask ourselves a question : How does a high-level language like Java communicate with such low level libraries ?
Java Native Interface
The JNI enables Java code to call and be called by native code, native applications (programs specific to a hardware and OS) and libraries written in other languages such as C, C++ or even assembly.
We can see this as the “bridge” between the ART (Java VM) and native code (directly interacting with real memory and processor).
III. Reversing the app
MainActivity class
After decompiling our APK file with JADX, let’s take a look at the MainActivity class.
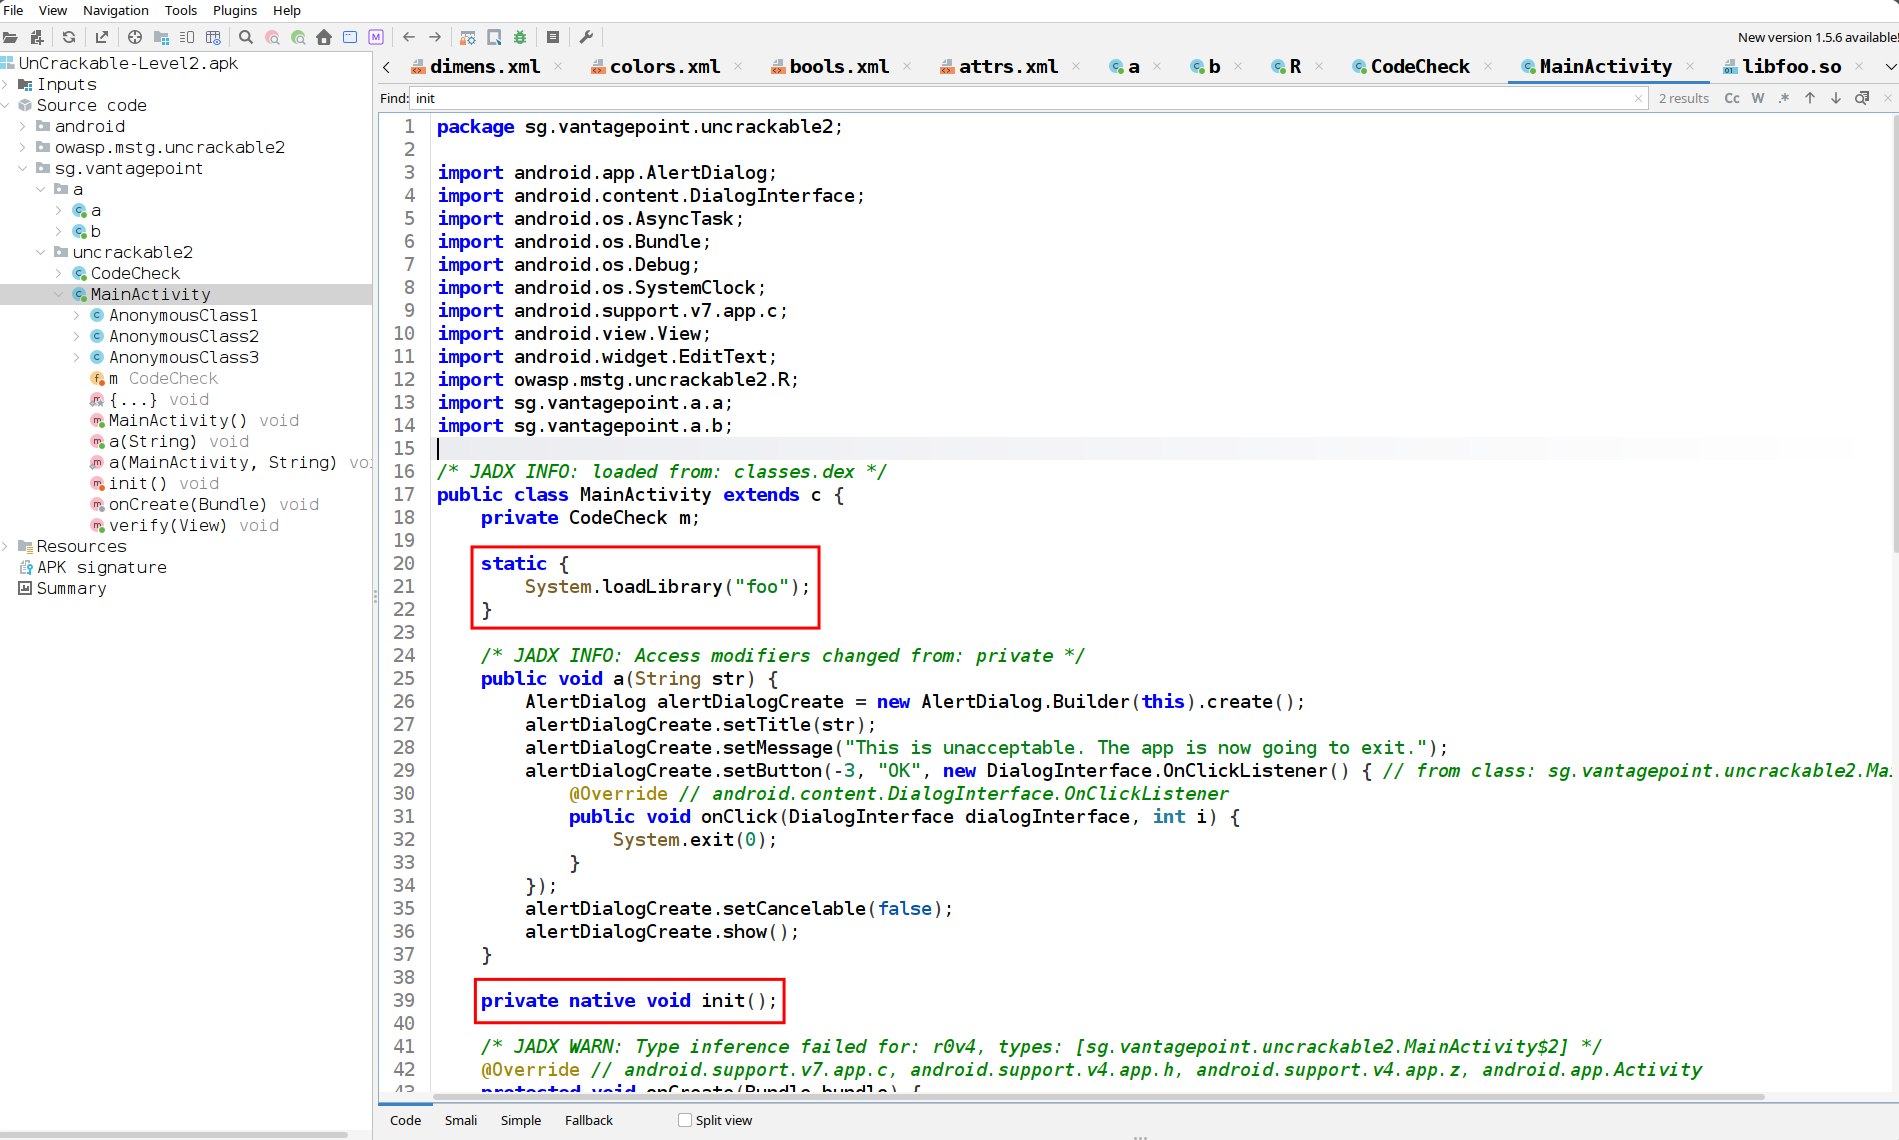
The program first loads the native libfoo.so library and declares a native init() method. This function code is written directly within the libfoo.so library.
It will later be called by the onCreate method at its very beginning.
| |
If you read my article about UncrackableL1, you must recognise the anti-root and anti-debug protections right after the init() call.
If any of these 4 checks is triggered, the MainActivity.a() method is called and forces the user to exit the app.
| |
Hooking the exit handler
We could easily bypass these just like the first crackme, but there’s an even faster way! Instead of individually hooking
b.a(),b.b(),b.c()anda.a(getApplicationContext()), we can directly hook theMainActivity.a(String str)so it does not force the user to exit the app anymore.
I already explained in the first writeup how to use Frida to hook functions, so here is the hooking code for the MainActivity.a(String str) function :
| |
Method overloading
As you can see, we had to use
overload()on ourMainActivity.amethod before defining its new implementation. If we did not, this is the message Frida would give us :Error: a(): has more than one overload, use .> overload(<signature>) to choose from: .overload('java.lang.String') .overload('sg.vantagepoint.uncrackable2.MainActivity', 'java.lang.String')How come Frida sees two methods while our decompiled code in JADX only shows one?
The answer lies in how Java handles inner classes. If we look closely at theonCreatemethod, the application uses an asynchronous task (AsyncTask, deprecated since Android API level 30) in the background. From this inner class, it calls theMainActivity.a()method.However, because
a()was originally declared as aprivatemethod, the inner class (AsyncTask) technically shouldn’t have access to it at the bytecode level. To fix this, the Java compiler silently generates a hidden synthetic bridge method (taking theMainActivityinstance as its first argument) to allow the connection.So while JADX is smart enough to hide this trick for the code to stay readable, Frida hooks directly into the Dalvik VM memory and sees everything. Therefore, we must explicitly use
.overload('java.lang.String')to tell Frida exactly which one of the two methods we want to redefine !
Let’s try to inject this script and see if it bypasses these protections.
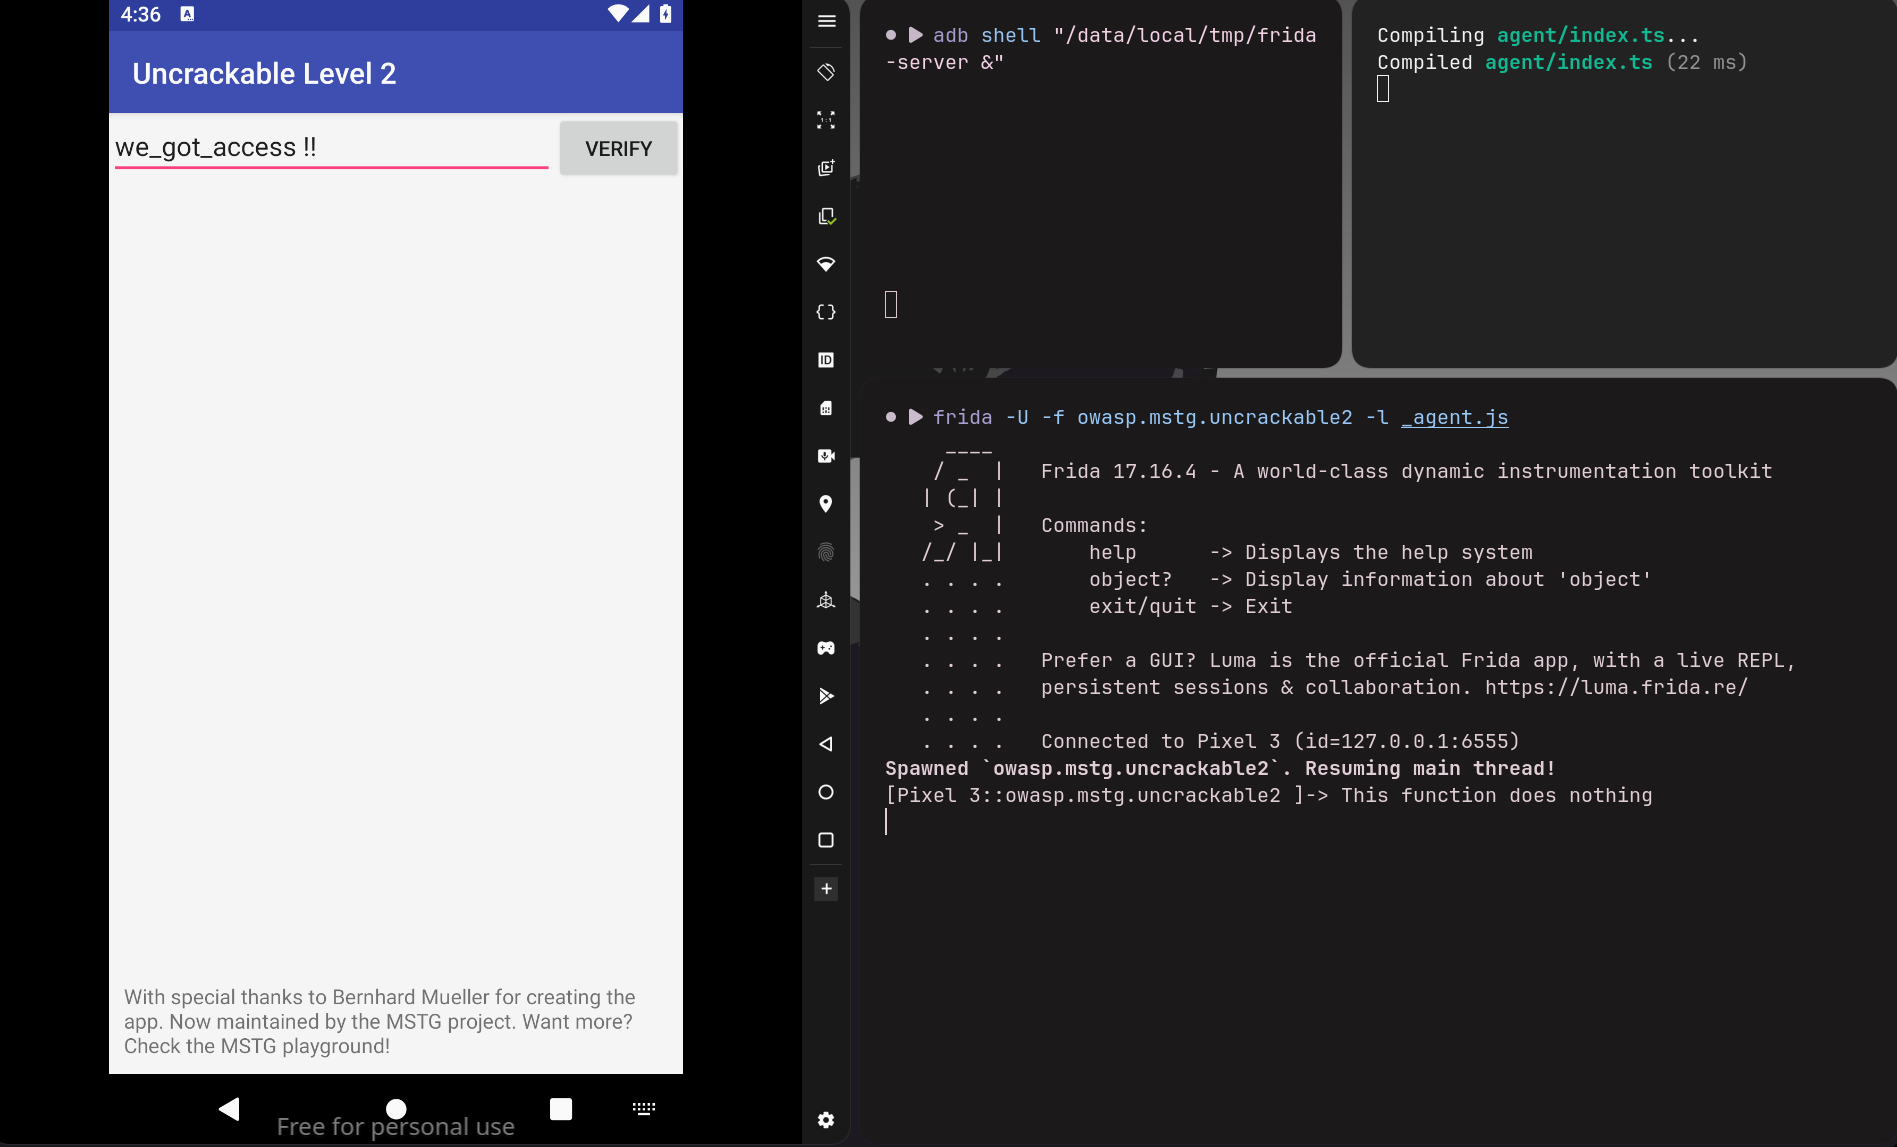
It does ! Also, notice how the AsyncTask protection is useless here ? At first we could believe it is due to the way we hooked MainActivity.a(String str) so it does not prompt anything. Actually, the Debug.isDebuggerConnected method checks if the Java Debug Wire Protocol (JDWP) is active. Since Frida injects itself directly into the process memory, it wouldn’t trigger the JDWP detection at all.
Since all these protections were implemented on the Java side rather than in the native library, bypassing them was really easy. With the app now running freely, we can focus on finding the correct secret.
CodeCheck and native library
Moving down to the end of onCreate(), we notice that a CodeCheck object is instantiated and stored in the m attribute
| |
Just like in the previous crackme, when the user submits their input, the verify() method is triggered. As we can see below, it retrieves the user’s input from the text field and delegates the actual verification to our CodeCheck object by calling this.m.a(string).
| |
Let’s take a look at the CodeCheck class.
| |
When a() is called, it simply converts the user input into a byte array and passes it to the native method bar(). This is where the interesting part begins!
In order to understand the logic behind bar(), we have to reverse the libfoo.so native library.
While looking for the library in Resources/lib in JADX, four versions of the library are available :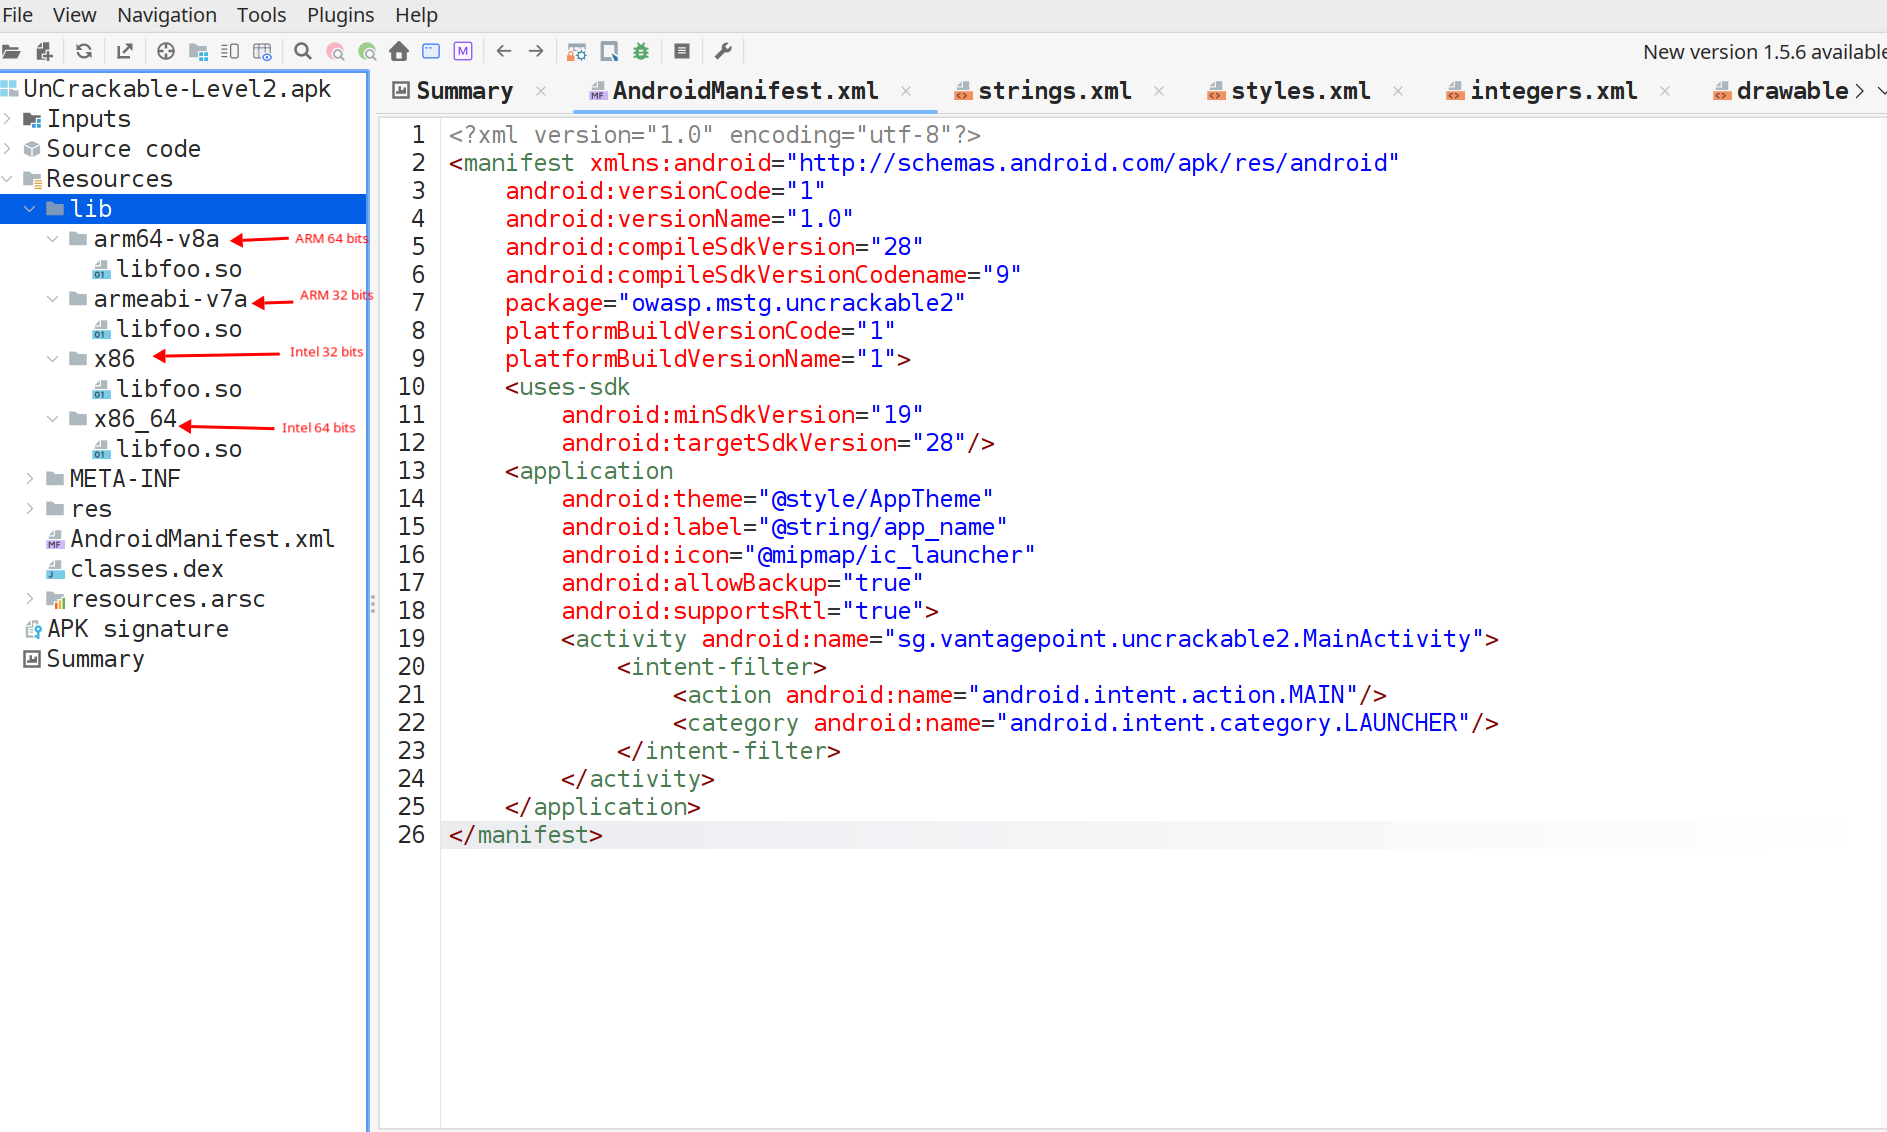
Choosing the library architecture
In order to choose the correct library to reverse we must select the one that matches the architecture of the device we are running the APK on. Since we’re running the app on an
x86emulator, we should extract and analyze thex86version oflibfoo.so.
We can grab the library of the architecture we want with this command :
| |
Static analysis of libfoo.so
Let’s look at the file, which is a classic ELF library. It’s obviously stripped but we’ll see how this is not a problem.
| |
Let’s open it with Ghidra. We can see a lot of stripped functions and the 2 native functions declared in the MainActivity Java source code.
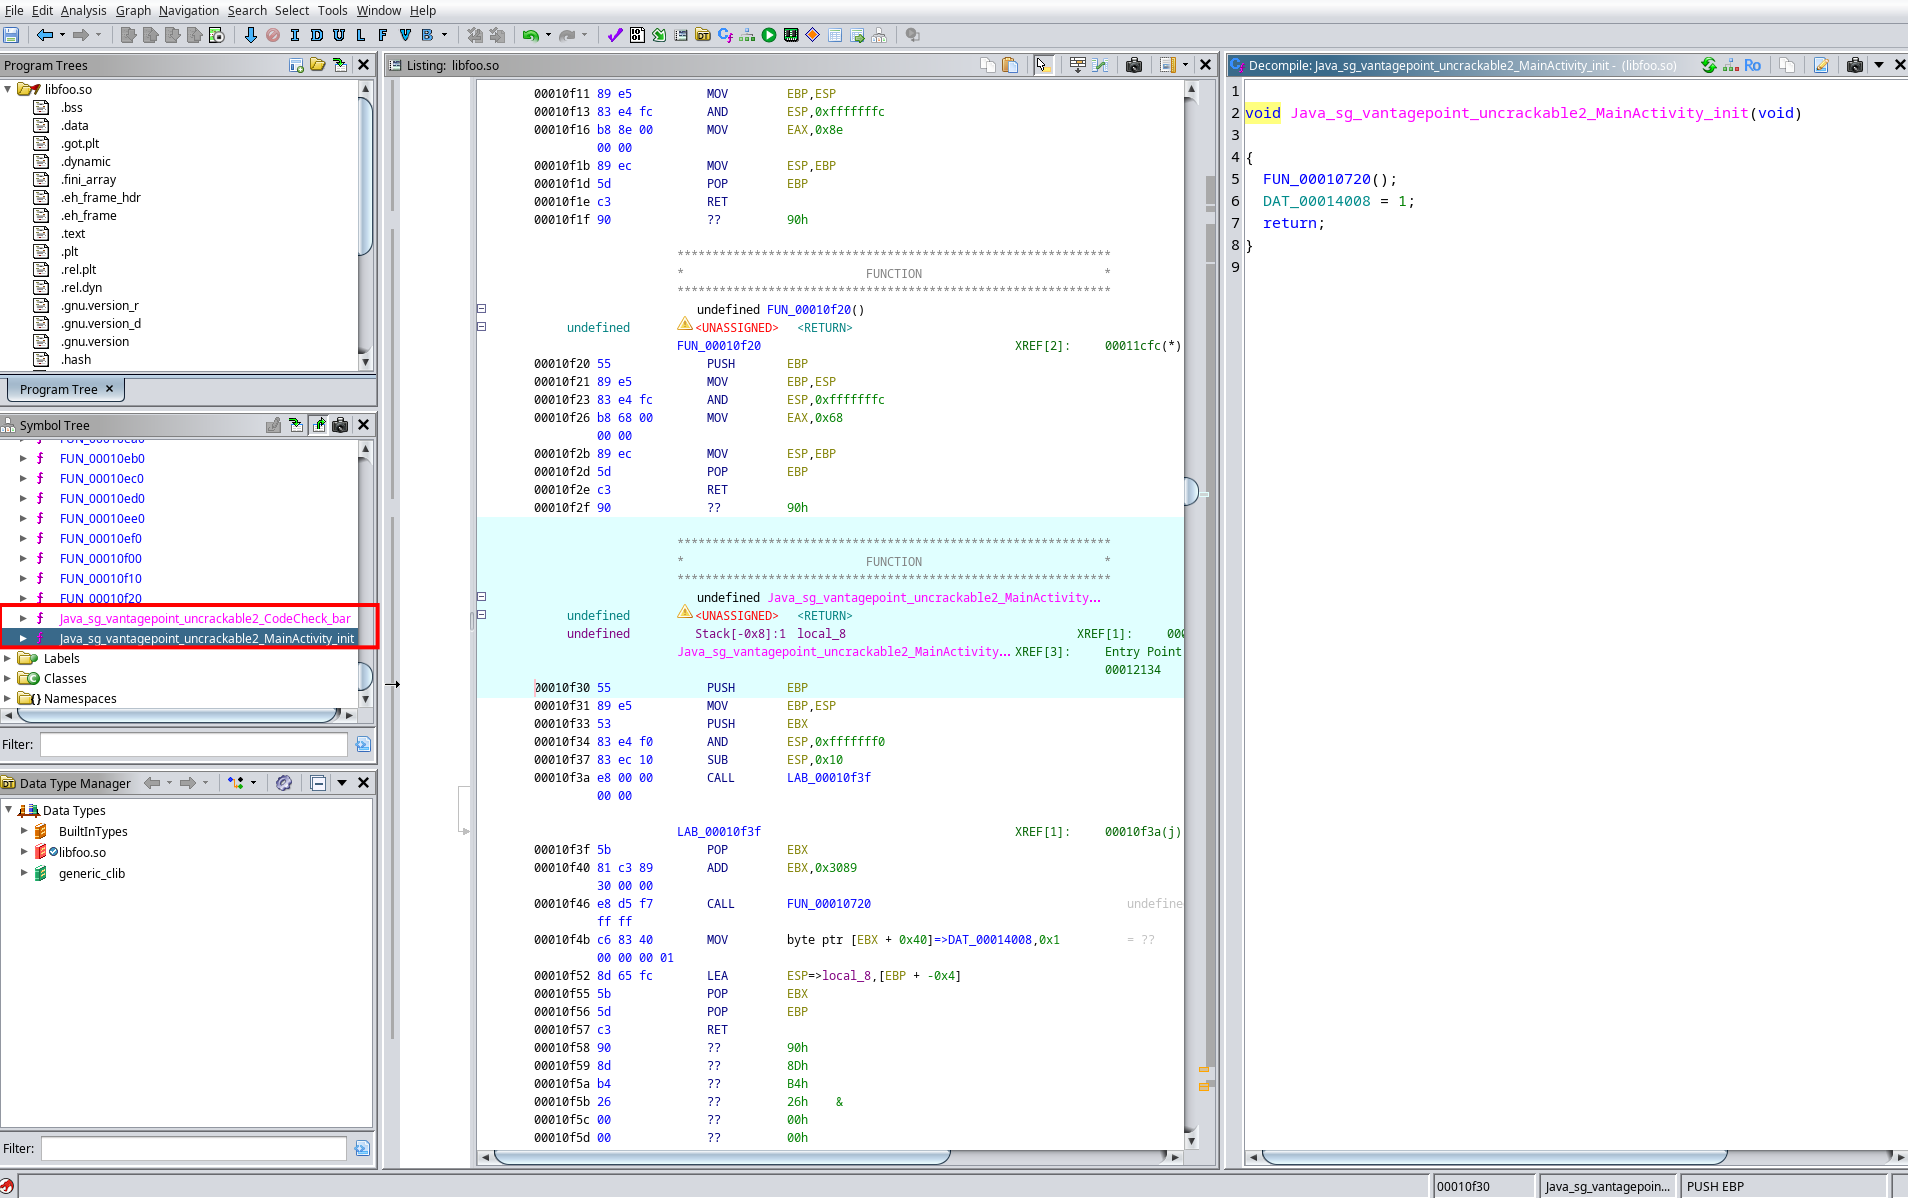
The JNI calling convention
If we look at init(void) in the top right corner of the screen, the function signature is the same : no argument. This looks normal at first but wait a bit…
In our Java code, bar(byte[] bArr) only takes one argument. However, its corresponding function in the native library (Java_sg_vantagepoint_uncrackable2_CodeCheck_bar) is shown taking three arguments !
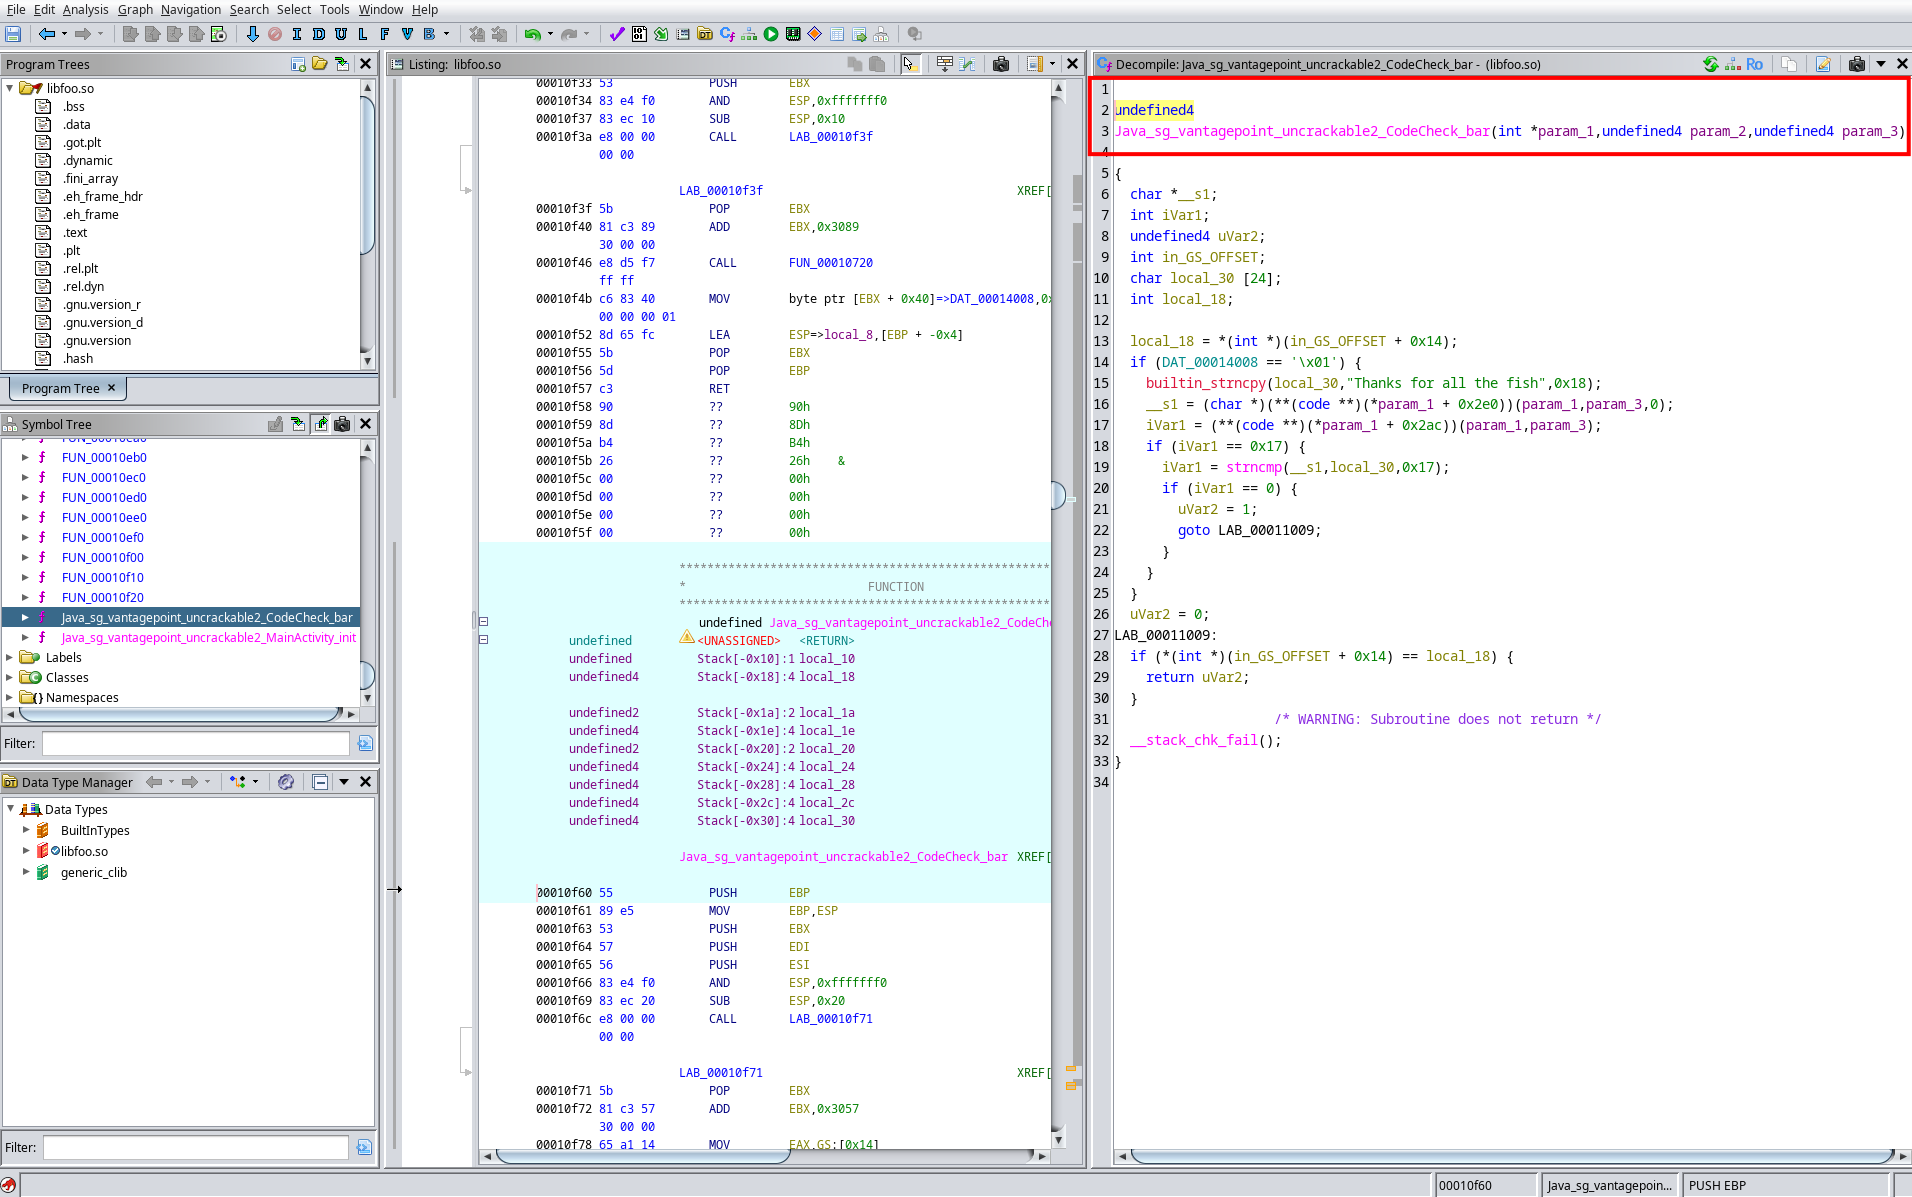
This brings us back to the core concept of the JNI as previously mentionned in the “Understanding Native Code” part. When the Android Virtual Machine calls a native C/C++ function, it doesn’t just send the arguments defined in the Java code method signature. It silently injects two mandatory implicit parameters at the very beginning of the call :
JNIEnv *env: A pointer to the JNI environment. Basically, it’s the API that allows C code to interact back with Java (instantiate classes, read strings, extract arrays, etc.).jobject thiz(orjclass): The reference to the calling Java object (we can see it as the equivalent ofthisin Java).
Knowing this rule, the 3 parameters on our bar(...) function suddenly makes sense:
- 2 implicit arguments relative to the JNI + 1 explicit argument (our byte array).
The question we can ask ourselves now is : Why doesn’t the init() method have these 2 JNI related arguments ?
If we look at the assembly code of the init() function, we can see that none of the two first JNI related parameters are used (we’re in x86 32-bit so function parameters are passed by being pushed on the stack). This is why Ghidra does not display them.
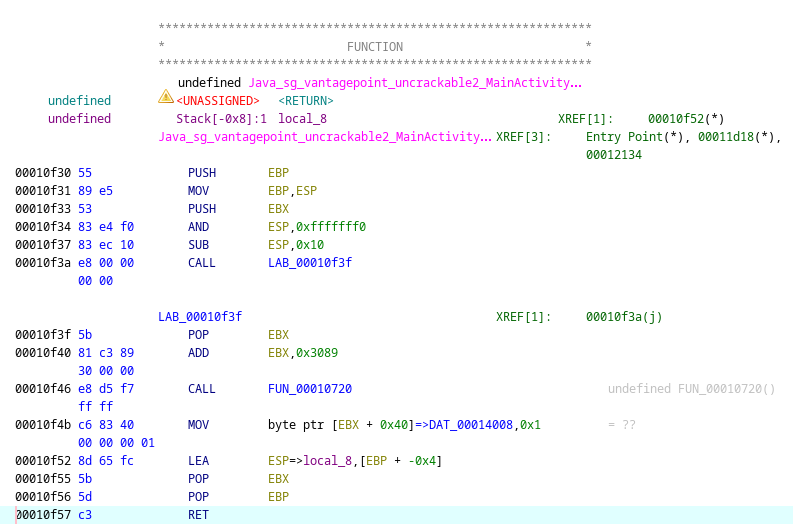
Getting the secret
This crackme was not really fun as the flag was hardcoded in the bar() function code :(
This is what we have after correctly renaming the variables :
| |
To confirm the interpretation of this pseudo-code, let’s try to submit this exact input : “Thanks for all the fish”.
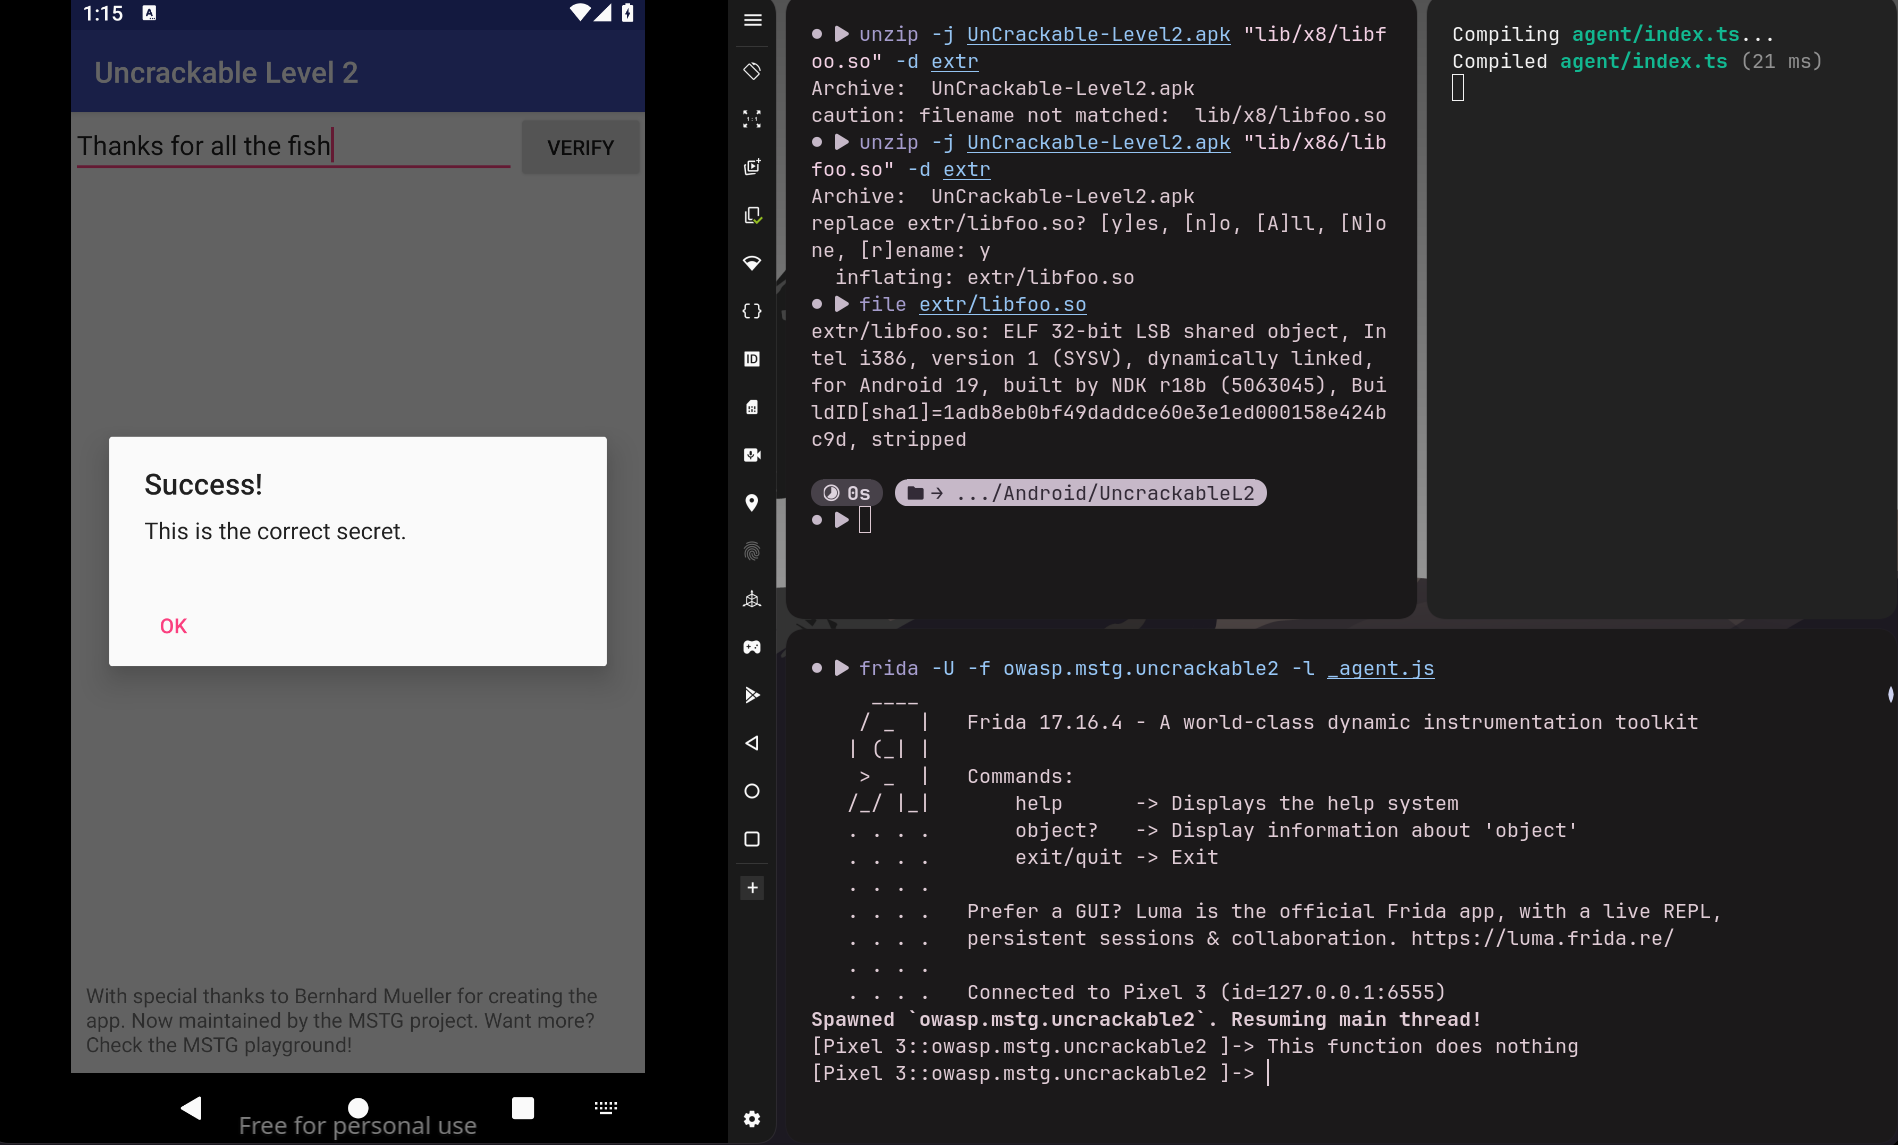
I’m pretty unhappy about the situation as we could have seen :
- How to setup ghidra so it recognises precises JNI API functions calls in the native code.
- How to hook native functions.
We’ll probably see this in the UncrackableL3, so don’t mind checking it !